USE ANDROID

Android Aplication, all about android

Showing posts with label Google Play. Show all posts

Introducing Google Play


[This post is by Kenneth Lui, Android Developer Ecosystem. —Dirk Dougherty]

For more than a year we’ve been focused on expanding the reach, content, and monetization opportunities of Android Market. We started by extending the store to users on the web and then went on to add books, movies, and music. The number of people who have visited, registered, and downloaded from the store has been amazing.


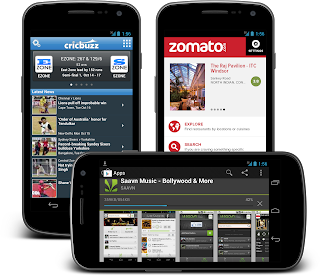
Today we’re launching Google Play, an integrated destination for apps, books, movies, and music, accessible to users on Android devices and to anyone on the Web. As part of this launch, Google Play replaces and extends Android Market — users everywhere can now find their favorite apps and games in Google Play, with other digital content, all in one place.


We believe that with a strong brand, compelling offerings, and a seamless purchasing and consumption experience, Google Play will drive more traffic and revenue to the entire ecosystem.


We’ll be investing in the brand to bring Google Play to as many people as possible, and we’ll also invest in the latest digital content to keep Google Play fresh, relevant, and engaging. Apps and games remain the core of Google Play, so we’ll continue investing in new ways to connect users with their favorite apps, and developers with new customers.


As we grow and promote Google Play around the world, we’ll be marketing your apps and games at the same time. Our policies have not changed and our goal is still the same — to create a great, open marketplace for distributing Android apps.


Google Play is built on the same infrastructure as Android Market, so the transition for users and developers will be seamless. Users can sign into their existing accounts with the same credentials as before and purchase content using the same payment methods. As a developer, there’s no change needed to your published products and you can continue to use the same publishing tools to put your app in front of hundreds of millions of Android users. If your app was in Android Market yesterday, it’s in Google Play today.


We’ll be rolling out Google Play to devices in a phased OTA update, starting today and continuing over the days to come. With the update, the Android Market app will upgrade to the Play Store app and the Music, Videos, and Books apps will upgrade to Play Music, Play Movies, and Play Books. This update is for devices running Android 2.2 or higher, and users on other devices will continue to have the same access to your apps as before.


You can start sending customers to your products in Google Play right away. Check out the updated “Get it on Google Play” badges and look for an email with more details on the transition. In the meantime, you can check out the Google Play web site at the link below and join the discussion on +Android Developers.


Android Developer Story: Smule

Check out our latest Android developer story, this one from Smule, creators of AutoRap, Magic Piano, and Songify.


In this short video, the Smule team talks about their experiences launching on Android, the explosive global growth they’ve seen on Google Play, and some of the techniques they use to market and monetize their products effectively across the world.


Visit the Spotlight pages in the Android Developers site to see our growing list of developer stories.


Localize Your Promotional Graphics on Google Play

Posted by Ellie Powers, Product Manager on the Google Play team


Google Play is your way to reach millions and millions of Android users around the world. In fact, since the start of 2011, the number of countries where you can sell apps has increased from 30 to over 130 — including most recently, the launch of paid app support in Israel, Mexico, the Czech Republic, Poland, Brazil and Russia, and fully two-thirds of revenue for apps on Google Play comes from outside of the United States.


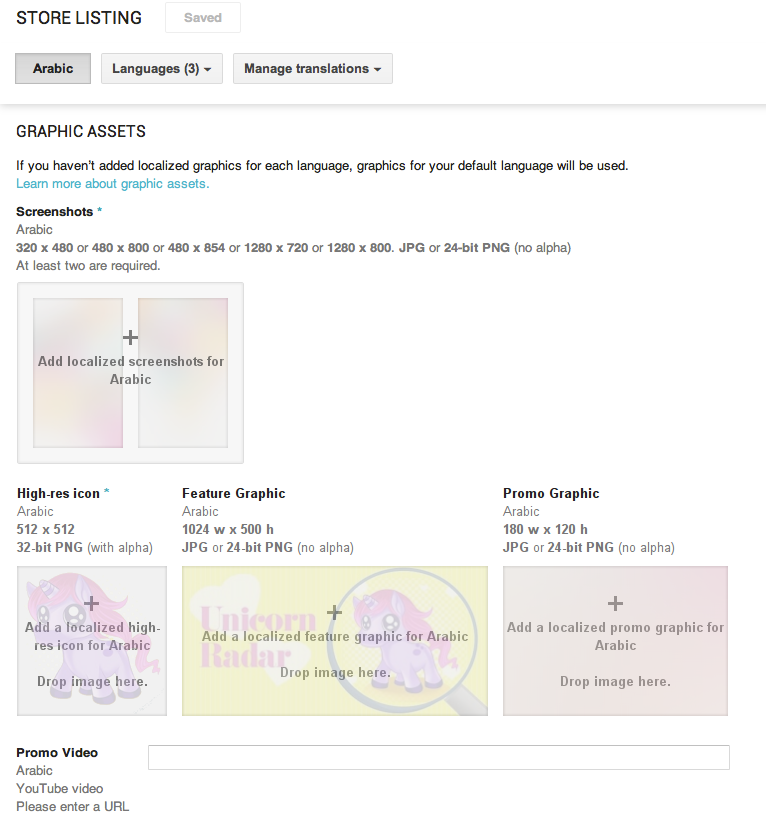
To help you capitalize on this growing international audience, it’s now even easier to market your apps to users around the world, by adding images and a video URL to your Google Play store listing for each of Google Play’s 49 languages, just as you’ve been able to add localized text.


A localized feature graphic can show translated text or add local flavor to your app — for example, changing its theme to reflect local holidays. Always make sure that your feature graphic works at different sizes.


Once you’ve localized your app, you’ll want to make sure users in all languages can understand what your app does and how it can benefit them. Review the graphics guidelines and get started with localized graphics.


Localized screenshots make it clear to the user that they’ll be able to use your app in their language. As you’re adding localized screenshots, remember that a lot of people will be getting new tablets for the holidays, and loading up with new apps, so you’ll want to include localized tablet screenshots to show off your tablet layouts.


With localized videos, you can now include a language-appropriate voiceover and text, and of course show the app running in the user’s language.


Ready to add localized images and videos to your store listing? To add localized graphics and video to your apps, you need to use the Google Play Developer Console preview — once you add localized graphics, you won’t be able to edit the app using the old version anymore. Those of you who use APK Expansion Files will now want to try the new Developer Console because it now includes this feature. We’ll be adding support for Multiple APK very soon. Once you’ve saved your application in the new Developer Console, automated translations become available to users on the web and devices — with no work from you.


What are you doing to help your app reach a global audience?


In-App Billing Version 3

In-App Billing Version 3

Posted by Posted by Bruno Oliveira of the Android Developer Relations Team


In-app Billing has come a long way since it was first announced on Google Play (then Android Market). One year and a half later, the vast majority of top-grossing apps on Google Play use In-app Billing and thousands of developers monetize apps through try-and-buy, virtual goods, as well as subscriptions.


In-app Billing is expanding again, making it even more powerful and flexible so you can continue to build successful applications. Version 3 introduces the following new features:

  • An improved design that makes applications simpler to write, debug and maintain. Integrations that previously required several hundred lines of code can now be implemented in as few as 50.

  • More robust architecture resulting in fewer lost transactions.

  • Local caching for faster API calls.

  • Long-anticipated functionality such as the ability to consume managed purchases and query for product information.

In-app Billing version 3 is available now and lets you sell both in-app items and (since February 2013) subscriptions, including subscriptions with free trials. It is supported by Android 2.2+ devices running the latest version of the Google Play Store (over 90% of active devices).

Instead of the four different application components required by the asynchronous structure of the previous release, the new version of the API allows developers to make synchronous requests and handle responses directly from within a single Activity, all of which are accomplished with just a few lines of code. The reduced implementation cost makes this a great opportunity for developers who are implementing new in-app billing solutions.


Easier to Implement


In contrast to the earlier model of asynchronous notification through a background service, the new API is now synchronous and reports the result of a purchase immediately to the application. This eliminates the necessity to integrate the handling of asynchronous purchase results into the application's lifecycle, which significantly simplifies the code that a developer must write in order to sell an in-app item.


To launch a purchase, simply obtain a buy Intent from the API and start it:


Bundle bundle = mService.getBuyIntent(3, "com.example.myapp",
MY_SKU, ITEM_TYPE_INAPP, developerPayload);

PendingIntent pendingIntent = bundle.getParcelable(RESPONSE_BUY_INTENT);
if (bundle.getInt(RESPONSE_CODE) == BILLING_RESPONSE_RESULT_OK) {
// Start purchase flow (this brings up the Google Play UI).
// Result will be delivered through onActivityResult().
startIntentSenderForResult(pendingIntent, RC_BUY, new Intent(),
Integer.valueOf(0), Integer.valueOf(0), Integer.valueOf(0));
}


Then, handle the purchase result that's delivered to your Activity's onActivityResult() method:


public void onActivityResult(int requestCode, int resultCode, Intent data) {
if (requestCode == RC_BUY) {
int responseCode = data.getIntExtra(RESPONSE_CODE);
String purchaseData = data.getStringExtra(RESPONSE_INAPP_PURCHASE_DATA);
String signature = data.getStringExtra(RESPONSE_INAPP_SIGNATURE);

// handle purchase here (for a permanent item like a premium upgrade,
// this means dispensing the benefits of the upgrade; for a consumable
// item like "X gold coins", typically the application would initiate
// consumption of the purchase here)
}
}


Also, differently from the previous version, all purchases are now managed by Google Play, which means the ownership of a given item can be queried at any time. To implement the same mechanics as unmanaged items, applications can consume the item immediately upon purchase and provision the benefits of the item upon successful consumption.


Local Caching


The API leverages a new feature of the Google Play store application which caches In-app Billing information locally on the device, making it readily available to applications. With this feature, many API calls will be serviced through cache lookups instead of a network connection to Google Play, which significantly speeds up the API's response time. For example, an application could query the owned items using this call:


Bundle bundle = mService.getPurchases(3, mContext.getPackageName(), ITEM_TYPE_INAPP);
if (bundle.getInt(RESPONSE_CODE) == BILLING_RESPONSE_RESULT_OK) {
ArrayList mySkus, myPurchases, mySignatures;
mySkus = bundle.getStringArrayList(RESPONSE_INAPP_ITEM_LIST);
myPurchases = bundle.getStringArrayList(RESPONSE_INAPP_PURCHASE_DATA_LIST);
mySignatures = bundle.getStringArrayList(RESPONSE_INAPP_PURCHASE_SIGNATURE_LIST);

// handle items here
}


Querying for owned items was an expensive server call in previous versions of the API, so developers were discouraged from doing so frequently. However, since the new version implements local caching, applications can now make this query every time they start running, and as often as necessary thereafter.


Product Information


The API also introduces a long-anticipated feature: the ability to query in-app product information directly from Google Play. Developers can now programmatically obtain an item's title, description and price. No currency conversion or formatting is necessary: prices are reported in the user's currency and formatted according to their locale:


Bundle bundle = mService.getSkuDetails(3, "com.example.myapp", 
ITEM_TYPE_INAPP, skus); // skus is a Bundle with the list of SKUs to query
if (bundle.getInt(RESPONSE_CODE) == BILLING_RESPONSE_RESULT_OK) {
List detailsList = bundle.getStringArrayList(RESPONSE_SKU_DETAILS_LIST);
for (String details : detailsList) {
// details is a JSON string with
// SKU details (title, description, price, ...)
}
}


This means that, for example, developers can update prices in Developer Console and then use this API call to show the updated prices in the application (such as for a special promotion or sale) with no need to update the application's code to change the prices displayed to the user.


Sample Application


In addition to the API, we are releasing a new sample application that illustrates how to implement In-app Billing. It also contains helper classes that implement commonly-written boilerplate code such as marshalling and unmarshalling data structures from JSON strings and Bundles, signature verification, as well as utilities that automatically manage background work in order to allow developers to call the API directly from the UI thread of their application. We highly recommend that developers who are new to In-app Billing leverage the code in this sample, as it further simplifies the process of implemention. The sample application is available for download through the Android SDK Manager.


App-Specific Keys


Along with the other changes introduced with In-app Billing Version 3, we have also improved the way Licensing and In-app Billing keys are managed. Keys are now set on a per-app basis, instead of a per-developer basis and are available on the “Services & APIs” page for each application on Google Play Developer Console preview. Your existing applications will continue to work with their current keys.


Get Started!


To implement In-app Billing in your application using the new API, start with the updated In-App Billing documentation and take the Selling In-App Products training class.

Google Play Seller Support in India

Posted by Ibrahim Elbouchikhi, Product Manager on the Google Play team


Over the past year, Android device activations in India have jumped more than 400%, bringing millions of new users to Google Play and driving huge increases in app downloads. In the last six months, Android users in India downloaded more apps than in the previous three years combined, and India has rocketed to become the fourth-largest market worldwide for app downloads. To help developers capitalize on this tremendous growth, we are launching Google Play seller support in India.


Starting today, developers in India can sell paid applications, in-app products, and subscriptions in Google Play, with monthly payouts to their local bank accounts. They can take advantage of all of the tools offered by Google Play to monetize their products in the best way for their businesses, and they can target their products to the paid ecosystem of hundreds of millions of users in India and across the world.


If you are an Android developer based in India, you can get started right away by signing in to your Developer Console and setting up a Google Checkout merchant account. If your apps are already published as free, you can monetize them by adding in-app products or subscriptions. For new apps, you can publish the apps as paid, in addition to selling in-app products or subscriptions.


When you’ve prepared your apps and in-app products, you can price them in any available currencies, publish, and then receive payouts and financial data in your local currency. Visit the developer help center for complete details.


Along with seller support, we're also adding buyer’s currency support for India. We encourage developers everywhere to visit your Developer Console as soon as possible to set prices for your products in Indian Rupees and other new currencies (such as Russian Rubles).


Stay tuned for more announcements as we continue to roll out Google Play seller support to many more countries around the world.


Building Quality Tablet Apps

Posted by Reto Meier, Android Developer Relations Tech Lead


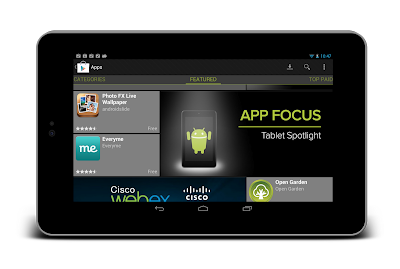
With the release of Nexus 7 earlier this year, we shared some tips on how you can get your apps ready for a new wave of Android tablets. With the holiday season now approaching, we’re creating even more ways for great tablet apps to be featured in Google Play - including a series of new app collections that highlight great apps specifically for tablet users.


To help you take advantage of the opportunity provided by the growing tablet market, we’ve put together this Tablet App Quality Checklist to make it easier for you to ensure your app meets the expectations of tablet users.


The checklist includes a number of key focus areas for building apps that are a great experience on tablets, including:

  • Optimizing your layouts for larger screens

  • Taking advantage of extra screen area available on tablets

  • Using Icons and other assets that are designed for tablet screens


Each focus area comprises several smaller tasks or best practices. As you move through the checklist, you'll find links to support resources that can help you address the topics raised in each task.


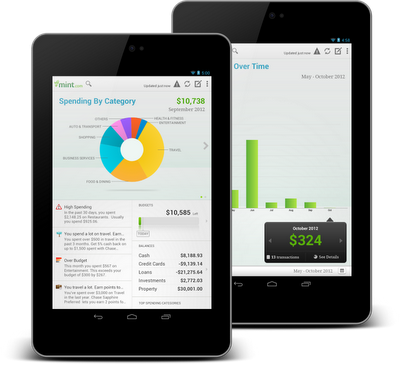
The benefits of building an app that works great on tablets is evident in the experiences of Mint.com, Tiny Co, and Instapaper who reported increased user engagement, better monetization, and more downloads from tablet users. You can find out more about their experience in these developer case studies.


The Tablet Quality Checklist is a great place to get started, but it’s just the beginning. We’ll be sharing more tablet development tips every day this week on +Android Developers. In Android Developers Live, Tuesday’s Android Design in Action broadcast will focus on optimizing user experience for tablets, on Thursday we’ll be interviewing our tablet case studies during Developers Strike Back, and on Friday’s live YouTube broadcasts of The App Clinic and Friday Games Review will be reviewing apps and games on Android tablets.


What are your best tips for building great

tablet apps?


Join the discussion on

+Android Developers


Google Play services and OAuth Identity Tools

Google Play services and OAuth Identity Tools

Posted by Tim Bray

The rollout of Google Play services to all Android 2.2+ devices worldwide is now complete, and all of those devices now have new tools for working with OAuth 2.0 tokens. This is an example of the kind of agility in rolling out new platform capabilities that Google Play services provides.

Why OAuth 2.0 Matters

The Internet already has too many usernames and passwords, and they don’t scale. Furthermore, your Android device has a strong notion of who you are. In this situation, the industry consensus is that OAuth 2.0 is a good choice for the job, offering the promise of strong security minus passwords.

Google Play services make OAuth 2.0 authorization available to Android apps that want to access Google APIs, with a good user experience and security.

Typically, when you want your Android app to use a Google account to access something, you have to pick which account on the device to use, then you have to generate an OAuth 2.0 token, then you have to use it in your HTTP-based dialogue with the resource provider.

These tasks are largely automated for you if you’re using a recent release of the Google APIs Client Library for Java; the discussion here applies if you want to access the machinery directly, for example in sending your own HTTP GETs and POSTs to a RESTful interface.

Preparation

Google Play services has just started rolling out, and even after the rollout is complete, will only be available on compatible Android devices running 2.2 or later. This is the vast majority, but there will be devices out there where it’s not available. It is also possible for a user to choose to disable the software.

For these reasons, before you can start making calls, you have to verify that Google Play services is installed. To do this, call isGooglePlayServicesAvailable(). The result codes, and how to deal with them, are documented in the ConnectionResult class.

Choosing an Account

This is not, and has never been, rocket science; there are many examples online that retrieve accounts from Android’s AccountManager and display some sort of pick list. The problem is that they all have their own look and feel, and for something like this, which touches on security, that’s a problem; the user has the right to expect consistency from the system.

Now you can use the handy AccountPicker.newChooseAccountIntent() method to give you an Intent; feed it to startActivityForResult() and you’ll launch a nice standardized user experience that will return you an account (if the user feels like providing one).

Two things to note: When you’re talking to these APIs, they require a Google account (AccountManager can handle multiple flavors), so specify GoogleAuthUtil.GOOGLE_ACCOUNT_TYPE argument as the value for the allowableAccountTypes argument. Second, you don’t need an android.accounts.Account object, you just use the email-address string (available in account.name) that uniquely identifies it.

Getting a Token

There’s really only one method call you need to use, GoogleAuthUtil.getToken(). It takes three arguments: a Context, an email address, and another string argument called scope. Every information resource that is willing to talk OAuth 2.0 needs to publish which scope (or scopes) it uses. For example, to access the Google+ API, the scope is oauth2:https://www.googleapis.com/auth/plus.me. You can provide multiple space-separated scopes in one call and get a token that provides access to all of them. Code like this might be typical:

  private final static String G_PLUS_SCOPE = 
"oauth2:https://www.googleapis.com/auth/plus.me";
private final static String USERINFO_SCOPE =
"https://www.googleapis.com/auth/userinfo.profile";
private final static String SCOPES = G_PLUS_SCOPE + " " + USERINFO_SCOPE;

In an ideal world, getToken() would be synchronous, but three things keep it from being that simple:

  1. The first time an app asks for a token to access some resource, the system will need to interact with the user to make sure they’re OK with that.


  2. Any time you ask for a token, the system may well have a network conversation with the identity back-end services.


  3. The infrastructure that handles these requests may be heavily loaded and not able to get you your token right away. Rather than keeping you waiting, or just failing, it may ask you to go away and come back a little later.


The first consequence is obvious; you absolutely can’t call getToken() on the UI thread, since it’s subject to unpredictable delays.

When you call it, the following things can happen:

  • It returns a token. That means that everything went fine, the back-end thinks the authorization was successful, and you should be able to proceed and use the token.


  • It throws a UserRecoverableAuthException, which means that you need to interact with the user, most likely to ask for their approval on using their account for this purpose. The exception has a getIntent() method, whose return value you can feed to startActivityForResult() to take care of that. Of course, you’ll need to be watching for the OK in the onActivityResult() method.


  • It throws an IOException, which means that the authorization infrastructure is stressed, or there was a (not terribly uncommon on mobile devices) networking error. You shouldn’t give up instantly, because a repeat call might work. On the other hand, if you go back instantly and pester the server again, results are unlikely to be good. So you need to wait a bit; best practice would be the classic exponential-backoff pattern.


  • It throws a GoogleAuthException, which means that authorization just isn’t going to happen, and you need to let your user down politely. This can happen if an invalid scope was requested, or the account for the email address doesn’t actually exist on the device.


Here’s some sample code:

       try {
// if this returns, the OAuth framework thinks the token should be usable
String token = GoogleAuthUtil.getToken(this, mRequest.email(),
mRequest.scope());
response = doGet(token, this);

} catch (UserRecoverableAuthException userAuthEx) {
// This means that the app hasn't been authorized by the user for access
// to the scope, so we're going to have to fire off the (provided) Intent
// to arrange for that. But we only want to do this once. Multiple
// attempts probably mean the user said no.
if (!mSecondTry) {
startActivityForResult(userAuthEx.getIntent(), REQUEST_CODE);
response = null;
} else {
response = new Response(-1, null, "Multiple approval attempts");
}

} catch (IOException ioEx) {
// Something is stressed out; the auth servers are by definition
// high-traffic and you can't count on 100% success. But it would be
// bad to retry instantly, so back off
if (backoff.shouldRetry()) {
backoff.backoff();
response = authenticateAndGo(backoff);
} else {
response =
new Response(-1, null, "No response from authorization server.");
}

} catch (GoogleAuthException fatalAuthEx) {
Log.d(TAG, "Fatal Authorization Exception");
response = new Response(-1, null, "Fatal authorization exception: " +
fatalAuthEx.getLocalizedMessage());
}

This is from a sample library I’ve posted on code.google.com with an AuthorizedActivity class that implements this. We think that some of this authorization behavior is going to be app-specific, so it’s not clear that this exact AuthorizedActivity recipe is going to work for everyone; but it’s Apache2-licensed, so feel free to use any pieces that work for you. It’s set up as a library project, and there’s also a small sample app called G+ Snowflake that uses it to return some statistics about your Google+ posts; the app is in the Google Play Store and its source is online too.

Registering Your App

Most services that do OAuth 2.0 authorization want you to register your app, and Google’s are no exception. You need to visit the Google APIs Console, create a project, pick the APIs you want to access off the Services menu, and then hit the API Access tab to do the registration. It’ll want you to enter your package name; the value of the package attribute of the manifest element in your AndroidManifest.xml.

Also, it’ll want the SHA1 signature of the certificate you used to sign your app. Anyone who’s published apps to Google Play Apps knows about keystores and signing. But before you get there, you’ll be working with your debug-version apps, which are signed with a certificate living in ~/.android/debug.keystore (password: “android”). Fortunately, your computer probably already has a program called “keytool” installed; you can use this to get the signature. For your debug version, a correct incantation is:

keytool -exportcert -alias androiddebugkey -keystore ~/.android/debug.keystore -v -list

This will print out the SHA1 signature in a nicely labeled easy-to-cut-and-paste form.

This may feel a little klunky, but it’s worth it, because some magic is happening. When your app is registered and you generate a token and send it to a service provider, the provider can check with Google, which will confirm that yes, it issued that token, and give the package name of the app it was issued to. Those of you who who’ve done this sort of thing previously will be wondering about Client IDs and API Keys, but with this mechanism you don’t need them.

Using Your Token

Suppose you’ve registered your app and called GoogleAuthUtil.getToken() and received a token. For the purposes of this discussion, let’s suppose that it’s “MissassaugaParnassus42”. Then all you need to do is, when you send off an HTTP request to your service provider, include an HTTP header like so:

Authorization: Bearer MissassaugaParnassus42

Then your HTTP GETs and POSTs should Just Work. You should call GoogleAuthUtil.getToken() to get a token before each set of GETs or POSTs; it’s smart about caching things appropriately, and also about dealing with token expiry and refresh.

Once again, as I said at the top, if you’re happy using the Google APIs Client Library for Java, it’ll take care of all the client-side stuff; you’ll still need to do the developer console app registration.

Otherwise, there’s a little bit of coding investment here, but the payoff is pretty big: Secure, authenticated, authorized, service access with a good user experience.


Join the discussion on

+Android Developers


In-app Subscriptions in Google Play


[This post is by Ibrahim Elbouchikhi, Product Manager on the Google Play team. —Dirk Dougherty]


We launched In-app Billing on Google Play a year ago to give developers more ways to sell and engage users over the lifetime of their apps. Since the launch, In-app Billing has been extremely successful in helping developers monetize their apps through try-and-buy, virtual goods, upgrades, and other popular business models. Today, 23 of the 24 top-grossing apps in Google Play use In-app Billing, and the total revenue generated from in-app purchases exceeds revenue from traditional app purchases.


We’re now taking In-app Billing further by adding another important business model — subscriptions. Starting today, developers can use In-app Billing to sell monthly or annual subscriptions from inside of their apps. All subscriptions are auto-renewing, for every app and game and every type of subscription product. Developers just set the price and billing interval and Google Play manages the purchase transactions for them, just as it does for other in-app products and app purchases.


For users, Google Play provides a familiar and convenient purchase experience, highlighting subscription details such as price and billing interval before continuing with purchases. After the transaction, Google Play manages recurring billing and keeps users informed of new charges, sending them an email with each renewal. At any time, users can visit My Apps in the Play Store app to view their subscriptions and cancel any subscription as needed.


While making it easy for developers to offer a great purchasing experience, our subscriptions are also designed for flexibility. Developers can use them to monetize premium dynamic content such as journals and magazines, but they can also use them to sell access to bundled products, game levels, music and video content, value-added services, or any other digital content.


Building on Google Play’s strength as a truly cloud-connected experience, developers can offer users the ability to carry their subscriptions across multiple properties, services, or campaigns. To make this easier, we’re introducing an HTTP-based publisher API through which enterprise-scale backend servers can validate or cancel subscriptions. Using this API, for example, developers can extend access from their Android apps to their web properties, based on subscriptions that are purchased on Google Play.


In the coming days, several developers will be launching apps with Google Play subscriptions and we expect many more to follow. Glu Mobile is launching updated versions of its top Android titles, including Frontline Commando, offering subscriptions through custom VIP currency packages. "We're using Google Play subscriptions to offer consumers a compelling value and a single currency which they can use across Glu’s most popular titles” says Niccolo de Masi, CEO of Glu. “We're excited to bring these capabilities to our Android users and we believe that Google Play subscriptions will fuel further growth in our business."


If you’re a developer, you can get started with subscriptions right away by reading the In-app Billing documentation and downloading the updated sample app. If you are already using in-app billing, you’ll find that adding support for subscriptions is straightforward and involves only minor changes to your code.


You can publish your updated apps and subscription products as soon as you are ready. We’ve already rolled out client support to most Android devices worldwide, so any user with Google Play 3.5 or higher installed can buy subscriptions starting today.


We’re looking forward to seeing how you use subscriptions in your apps!


Join the discussion on

+Android Developers


New Seller Countries in Google Play

New Seller Countries in Google Play

Over the past year we’ve been working to expand the list of countries and currencies from which Android developers can sell their products. Starting today, developers in Czech Republic, Israel, Poland, and Mexico can sell priced applications and in-app products on Google Play, using their local bank accounts for payments. Welcome developers!


If you develop Android apps in one of the new countries and want to get started selling them, visit play.google.com/apps/publish and set up a new Google Play developer account. Once you’ve uploaded your apps, you can price them in any available buyer currencies, publish, and then receive payouts and financial data in your local currency.


If you are based in Israel or Mexico and are currently selling apps through an AdSense merchant account, you will need to migrate your apps to a new Google Play developer account in your local currency. Watch for an email that provides complete information on the migration process and timeline.


Additionally, we encourage developers everywhere to visit the Developer Console as soon as possible to set prices for their products in the currencies of these new countries. Stay tuned for more announcements soon as we continue to roll out our new billing infrastructure to buyers and sellers throughout the world.


Join the discussion on

+Android Developers


New Sales Reports on Google Play


[This post is by Debashish Chatterjee, Krishna Atkuru, and Ellie Powers of the Google Play Publisher Site team. —Dirk Dougherty]


For app publishers, complete and timely sales reporting is incredibly useful for managing a business on Google Play. Today we are introducing a new financial tool — Estimated Sales Reports — to give you visibility over ongoing product sales and help you support customers between payout cycles.


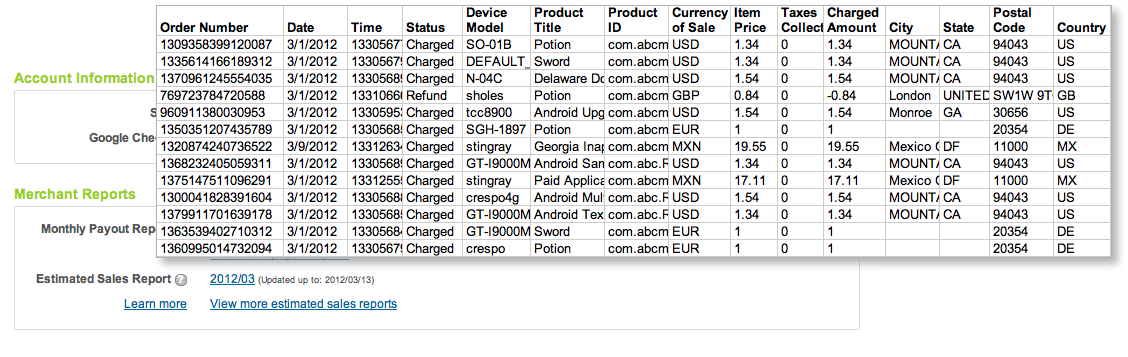
The new sales reports show you complete transaction details of recent sales and refunds for all products in your developer account, including both in-app products and paid apps. Each report is a cumulative for the current payout period, updated nightly with the details of recent transactions. As customers complete purchases and their accounts are charged (or refunds are applied), the new transaction details are appended to the Estimated Sales Report. Depending on account timezone differences, transactions appear on the estimated sales report within 2 days of completion. Finally, at the close of the monthly payout cycle, the current Estimated Sales Report is archived and a new report is created for the next cycle.


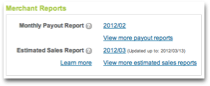
You can access current or past sales reports from the “Merchant Reports” section of the Developer Console. The Estimated Sales Reports are downloadable CSV (comma-separated values) files, so you can analyze the data using any tools you choose, in the same way as you've been doing for payout reports. The sales reports list the same details as payout reports — buyer and order, product, device information, amount, currency of sale, and more — except without final payment details. This makes it easier for you to reconcile recorded sales against your actual payouts. Estimated sales reports are available with data starting February 1, 2012.


We’ve also taken this opportunity to rename our existing “Merchant Sales Reports” to Monthly Payout Reports, to better reflect their content.


Together with the application statistics introduced last month, the Estimated Sales and Monthly Payout Reports give you a more complete view of your products’ download and sales activity over time. We hope you’ll find them useful. As always, please feel free to give us feedback through the Developer Help Center.


Join the discussion on

+Android Developers