
[This post is by Scott Main, lead tech writer for developer.android.com. — Tim Bray]
Before Android 3.0 (Honeycomb), all Android-powered devices included a dedicated Menu button. As a developer, you could use the Menu button to display whatever options were relevant to the user, often using the activity’s built-in options menu. Honeycomb removed the reliance on physical buttons, and introduced the ActionBar class as the standard solution to make actions from the user options immediately visible and quick to invoke. In order to provide the most intuitive and consistent user experience in your apps, you should migrate your designs away from using the Menu button and toward using the action bar. This isn’t a new concept — the action bar pattern has been around on Android even before Honeycomb. As Ice Cream Sandwich rolls out to more devices, it’s important that you begin to migrate your designs to the action bar in order to promote a consistent Android user experience.
You might worry that it’s too much work to begin using the action bar, because you need to support versions of Android older than Honeycomb. However, it’s quite simple for most apps because you can continue to support the Menu button on pre-Honeycomb devices, but also provide the action bar on newer devices with only a few lines of code changes.

If I had to put this whole post into one sentence, it’d be: Set targetSdkVersion to 14 and, if you use the options menu, surface a few actions in the action bar with showAsAction="ifRoom".
Don’t call it a menu
Not only should your apps stop relying on the hardware Menu button, but you should stop thinking about your activities using a “menu button” at all. Your activities should provide buttons for important user actions directly in the action bar (or elsewhere on screen). Those that can’t fit in the action bar end up in the action overflow.
In the screenshot here, you can see an action button for Search and the action overflow on the right side of the action bar.
Even if your app is built to support versions of Android older than 3.0 (in which apps traditionally use the options menu panel to display user options/actions), when it runs on Android 3.0 and beyond, there’s no Menu button. The button that appears in the system/navigation bar represents the action overflow for legacy apps, which reveals actions and user options that have “overflowed off the screen.”
This might seem like splitting hairs over terminology, but the name action overflow promotes a different way of thinking. Instead of thinking about a menu that serves as a catch-all for various user options, you should think more about which user options you want to display on the screen as actions. Those that don't need to be on the screen can overflow off the screen. Users can reveal the overflow and other options by touching an overflow button that appears alongside the on-screen action buttons.
Action overflow button for legacy apps
If you’ve already developed an app to support Android 2.3 and lower, then you might have noticed that when it runs on a device without a hardware Menu button (such as a Honeycomb tablet or Galaxy Nexus), the system adds the action overflow button beside the system navigation.

This is a compatibility behavior for legacy apps designed to ensure that apps built to expect a Menu button remain functional. However, this button doesn’t provide an ideal user experience. In fact, in apps that don’t use an options menu anyway, this action overflow button does nothing and creates user confusion. So you should update your legacy apps to remove the action overflow from the navigation bar when running on Android 3.0+ and begin using the action bar if necessary. You can do so all while remaining backward compatible with the devices your apps currently support.
If your app runs on a device without a dedicated Menu button, the system decides whether to add the action overflow to the navigation bar based on which API levels you declare to support in the <uses-sdk> manifest element. The logic boils down to:
If you set either minSdkVersion or targetSdkVersion to 11 or higher, the system will not add the legacy overflow button.
Otherwise, the system will add the legacy overflow button when running on Android 3.0 or higher.
The only exception is that if you set minSdkVersion to 10 or lower, set targetSdkVersion to 11, 12, or 13, and you do not use ActionBar, the system will add the legacy overflow button when running your app on a handset with Android 4.0 or higher.
That exception might be a bit confusing, but it’s based on the belief that if you designed your app to support pre-Honeycomb handsets and Honeycomb tablets, it probably expects handset devices to include a Menu button (but it supports tablets that don’t have one).
So, to ensure that the overflow action button never appears beside the system navigation, you should set the targetSdkVersion to 14. (You can leave minSdkVersion at something much lower to continue supporting older devices.)
Migrating to the action bar
If you have activities that use the options menu (they implement onCreateOptionsMenu()), then once the legacy overflow button disappears from the system/navigation bar (because you’ve set targetSdkVersion to 14), you need to provide an alternative means for the user to access the activity’s actions and other options. Fortunately, the system provides such a means by default: the action bar.
Add showAsAction="ifRoom" to the <item> elements representing the activity’s most important actions to show them in the action bar when space is available. For help deciding how to prioritize which actions should appear in the action bar, see Android Design’s Action Bar guide.

To further provide a consistent user experience in the action bar, we suggest that you use action icons designed by the Android UX Team where appropriate. The available icons support common user actions such as Refresh, Delete, Attach, Star, Share and more, and are designed for the light and dark Holo themes; they’re available on the Android Design downloads page.
If these icons don’t accommodate your needs and you need to create your own, you should follow the Iconography design guide.
Removing the action bar
If you don’t need the action bar, you can remove it from your entire app or from individual activities. This is appropriate for apps that never used the options menu or for apps in which the action bar doesn’t meet design needs (such as games). You can remove the action bar using a theme such as Theme.Holo.NoActionBar or Theme.DeviceDefault.NoActionBar.
In order to use such a theme and remain backward compatible, you can use Android’s resource system to define different themes for different platform versions, as described by Adam Powell’s post, Holo Everywhere. All you need is your own theme, which you define to inherit different platform themes depending on the current platform version.
For example, here’s how you can declare a custom theme for your application:
<application android:theme="@style/NoActionBar">
Or you can instead declare the theme for individual <activity> elements.
For pre-Honeycomb devices, include the following theme in res/values/themes.xml that inherits the standard platform theme:
<resources>
    <style name="NoActionBar" parent="@android:style/Theme">
        <!-- Inherits the default theme for pre-HC (no action bar) -->
    </style>
</resources>
For Honeycomb and beyond, include the following theme in res/values-v11/themes.xml that inherits a NoActionBar theme:
<resources>
    <style name="NoActionBar" parent="@android:style/Theme.Holo.NoActionBar">
        <!-- Inherits the Holo theme with no action bar; no other styles needed. -->
    </style>
</resources>
At runtime, the system applies the appropriate version of the NoActionBar theme based on the system’s API version.
Summary
Android no longer requires a dedicated Menu button, some devices don’t have one, and you should migrate away from using it.
Set targetSdkVersion to 14, then test your app on Android 4.0.
Add showAsAction="ifRoom" to menu items you’d like to surface in the action bar.
- If the ActionBar doesn’t work for your app, you can remove it with
Theme.Holo.NoActionBar or Theme.DeviceDefault.NoActionBar.
For information about how you should design your action bar, see Android Design’s Action Bar guide. More information about implementing the action bar is also available in the Action Bar developer guide.
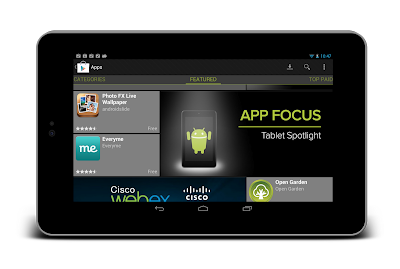 To help you take advantage of the opportunity provided by the growing tablet market, we’ve put together this Tablet App Quality Checklist to make it easier for you to ensure your app meets the expectations of tablet users.
 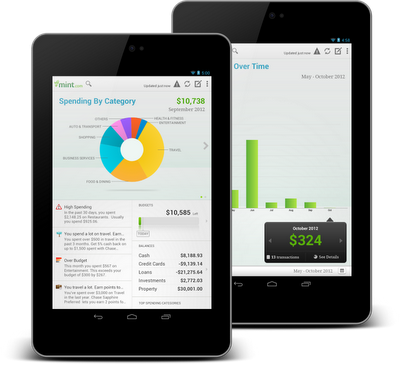 The Tablet Quality Checklist is a great place to get started, but it’s just the beginning. We’ll be sharing more tablet development tips every day this week on +Android Developers. In Android Developers Live, Tuesday’s Android Design in Action broadcast will focus on optimizing user experience for tablets, on Thursday we’ll be interviewing our tablet case studies during Developers Strike Back, and on Friday’s live YouTube broadcasts of The App Clinic and Friday Games Review will be reviewing apps and games on Android tablets.


